Building a floating desk can be an efficient and space-saving solution for any room. Before starting the assembly process, it is crucial to consider the necessary precautions and preliminary steps to ensure the safety and stability of the desk. Here is a detailed guide on how to build a floating desk, emphasizing safety measures and testing protocols. This guide applies to all types of floating desks, like floating corner desks, small floating desk or a floating storage desk.
Pre-Installation
Before commencing the assembly of your floating desk, it’s imperative to take necessary precautions to ensure your safety and the stability of the setup. Rigging a floating desk demands careful planning and execution, especially when dealing with heavy objects. Here’s a comprehensive guide on the preparatory steps to take before starting the assembly process:
-
Clear the Workspace Begin by clearing the designated area where the floating desk will be installed. Remove any obstacles or debris that might hinder the assembly process. Ensure that the floor is clean and free of any tripping hazards.
-
Assess the Wall Structure Before mounting the desk, examine the wall structure where it will be attached. Identify the type of wall material (drywall, plaster, brick, or concrete) and the load-bearing capacity. Consult a professional if you are unsure about the integrity of the wall or if modifications are needed to support the desk.
-
Recruit Assistance Rigging a floating desk often involves handling heavy objects and precise measurements. Enlist the help of at least one other person to assist with lifting and aligning the desk during the installation process. Clear communication and coordination between team members are essential to prevent accidents or injuries.
-
Inspect the Assembly Components Thoroughly inspect all the components included in the desk assembly kit. Confirm that all the necessary parts are present and undamaged. Identify each part and familiarize yourself with their functions as per the instruction manual.
-
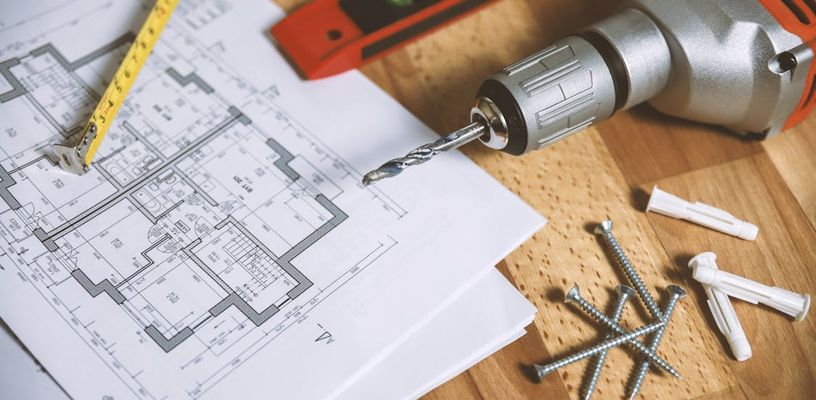
Gather the Required Tools Gather all the necessary tools required for the assembly process, such as a drill, level, measuring tape, screws, and other recommended tools mentioned in the instruction manual. Ensuring that you have all the required tools beforehand can save time and minimize potential hazards during the process.
- Locate the Studs or Mounting Points Using a stud finder, accurately locate the studs within the wall. Mark these positions clearly as they will serve as the primary support for the desk. If the desk requires mounting points other than studs, ensure you have the appropriate hardware for the wall type.
By following these preparatory steps, you can create a secure and stable foundation for assembling your floating desk, minimizing the risks associated with heavy lifting and wall mounting. Always prioritize safety and take necessary precautions to ensure a smooth and secure installation process.
Assembly and Installation
-
Review the Instruction Manual Carefully read the instruction manual provided by the manufacturer. Familiarize yourself with the parts and tools needed for assembly. Identify each part and understand its role in the assembly process. This will give you a better idea of what to expect and how to approach each step.
-
Organize the Components Sort and organize all the components of the desk. Group similar parts together to ensure easy accessibility during the assembly process. This will also help you keep track of all the components and prevent any missing parts during assembly.
-
Assemble the Desk Components Start by assembling the main components of the desk, such as the tabletop, legs, and any additional storage units. Follow the instructions provided in the manual carefully, ensuring that each part is securely attached and tightened. Use the recommended tools and hardware provided by the manufacturer.
-
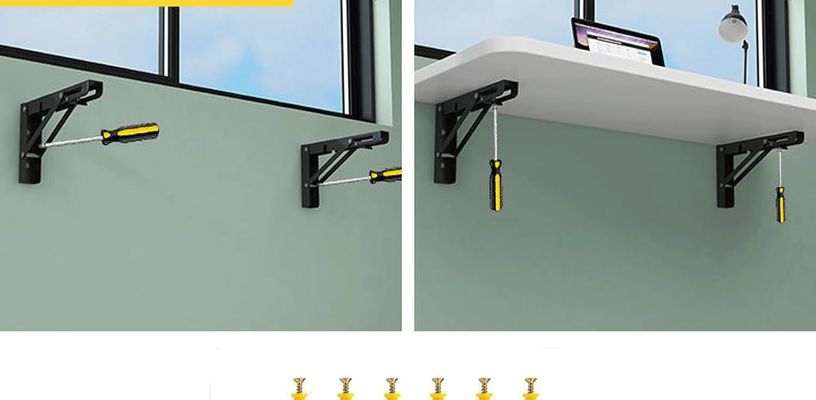
Mounting the Desk Carefully choose the appropriate location for mounting the desk. Ensure that the mounting area is free of any electrical wires or plumbing. Use a stud finder to locate the wall studs for a secure installation. Mark the positions where the desk will be mounted and ensure they are level and properly aligned.
-
Secure the Desk to the Wall With the help of another person, carefully lift the desk and position it against the wall at the marked location. Use a level to ensure that the desk is straight and properly aligned. Mark the points where the desk will be attached to the wall. Drill pilot holes into the wall at the marked points and use appropriate anchors and screws to securely fasten the desk to the wall.
-
Check the Weight Capacity Verify the weight capacity of the desk and the maximum load it can sustain. Refer to the manufacturer’s guidelines or product manual for this information. Exceeding the weight limit could compromise the stability of the desk and pose safety risks.
-
Check for Stability Once the desk is mounted, check for stability and make any necessary adjustments. Ensure that the desk is securely attached to the wall and doesn’t wobble or shake. Test the desk by applying gentle pressure to different parts to confirm its stability. This can also be done by placing moderately heavy objects on the table before placing more expensive items like a monitor and keyboard.
Safety Guidelines:
Weight Distribution: Distribute the weight evenly across the desk’s surface to prevent overloading specific areas.
Regular Maintenance: Periodically check the desk for any signs of wear and tear, and promptly address any issues to maintain its stability and safety.
Weight Limit: Adhere to the manufacturer’s recommended weight limit to prevent overloading and potential damage to the desk and wall.
Conclusion
Congratulations on you brand new desk setup! By following these steps and adhering to the safety guidelines, you can build a floating desk that not only maximizes space but also ensures the safety and stability of your workspace. Always prioritize safety during the entire process, from the initial planning stages to the final testing before using the desk.